 First Guide to SQL Anywhere Studio
 PART 2. Getting Results with SQL Anywhere Studio
 CHAPTER 9. Designing Databases with SQL Modeler
SQL Modeler can read the structure of a database from a script file that creates the database. However, it's generally easier to just connect to your database from SQL Modeler and let it extract the design directly.
The following tutorial uses the sample database as a starting point. Three modifications improve the design.
The price of each product is always read from the product table. As a result, updating the price effectively changes the sale price of that item on all previous orders.
Adding a unit_price column to the sales_order_items table corrects this problem. The actual selling price to each customer can now be stored separately. The price in the product table records the current list price.
Soon, expansion of the company will mean that some employees must work out of other offices. A new office table is added to contain information specific to a particular office, such as its address and central phone and fax numbers.
To facilitate the use of key joins, a reflexive manager reference is associated with the employee table.
The following tutorial shows you how to make all three of these modifications. In doing so, it introduces many of the basic elements of SQL Modeler.
 Start SQL Modeler:
From the Start menu, select Programs-> Sybase ->->SQL Modeler 6.1->SQL Modeler.
Initially, the SQL Modeler window will appear similar to that shown below.
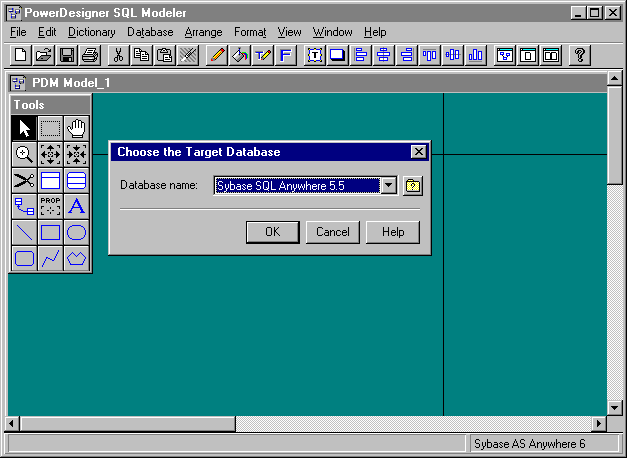
Select the database name Sybase AS Anywhere 6 from the list of Sybase database products.
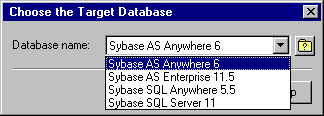
SQL Modeler needs to know which database you are building to customize options and to generate compatible SQL scripts. You can switch to another product later and generate a database for the new product.
SQL Modeler can reverse-engineer a database through and ODBC connection. If you are reverse-engineering your own database, you need to create a data source.
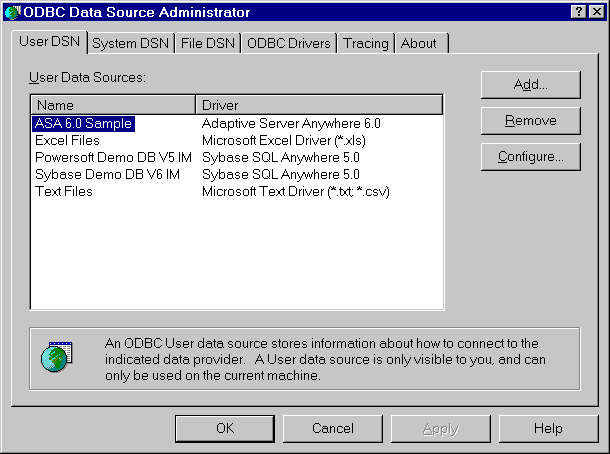
The setup program creates a data source for the sample database during installation. This data source is called ASA 6.0 Sample. If it is absent, you will need to create and configure another data source.
 Check or add the ODBC data source:
From the Start menu, select Programs->Sybase->Adaptive Server Anywhere 6.0->ODBC Administrator.
 For further information see Using ODBC data sources to connect.
Close the Data Source Administrator when you finish.
 Reverse-Engineer the database:
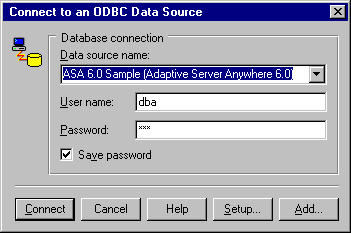
Connect to the sample database.
In SQL Modeler, select File->Sybase->Adaptive Server Anywhere 6.0->ODBC Administrator.
Select Using a ODBC driver. Check that the database name is Sybase AS Anywhere 6.
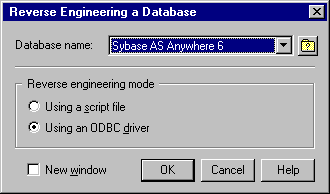
Select the ASA 6.0 Sample data source.
Choose Connect.
Pick the components of the database definition that you would like your model to contain.
Select all the tables.
Check all the reverse-engineering options.
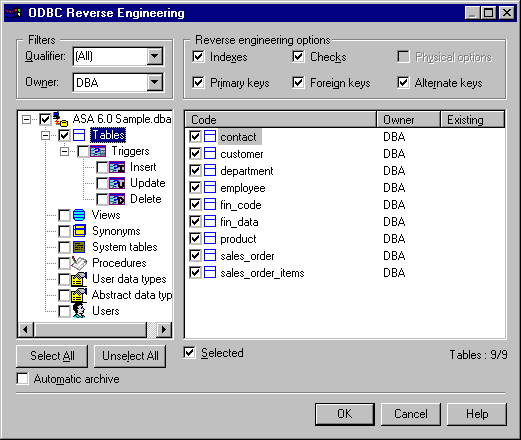
Choose OK to commence reverse engineering.
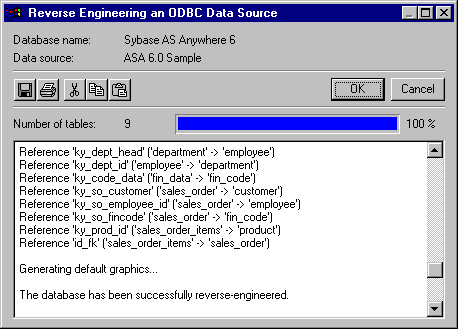
Verify that all 9 tables in the sample database are generated.
Choose OK to close this window.
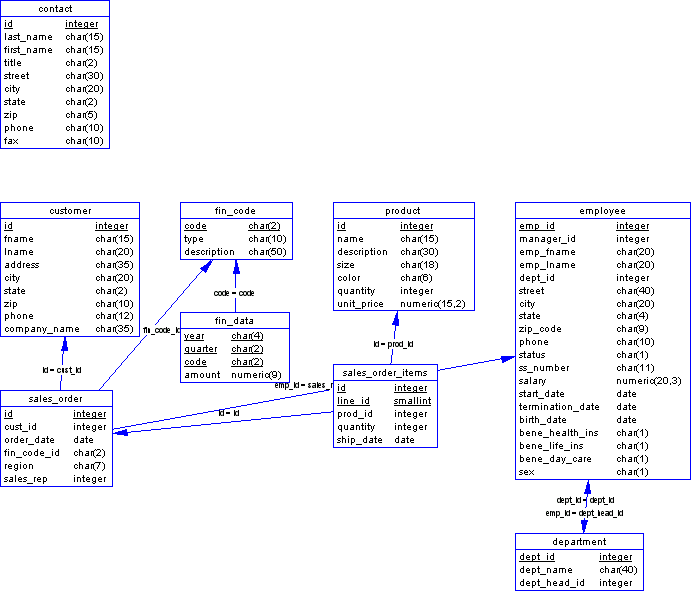
Examine the diagram before you.
Each table in your database is represented by a rectangular box. The name of the table appears at the top. Below, is a list of the columns. Column names that are underlined are part of the primary key for that table. The data type of each column appears on the right. Some of the tables may overlap.
References between tables are represented with arrows. The arrows point toward the parent table, that is the table that contains the primary key. An equation appears next to each arrow that identifies the reference.
You can drag tables, or groups of tables, around using the mouse. The reference arrows follow, automatically.
Arrange the tables neatly.

These buttons, located on the toolbar, greatly simplify the task of aligning tables, or tables and references. You can select multiple objects either by dragging, or by holding down the Shift key.
Tip |
One possible arrangement appears below.
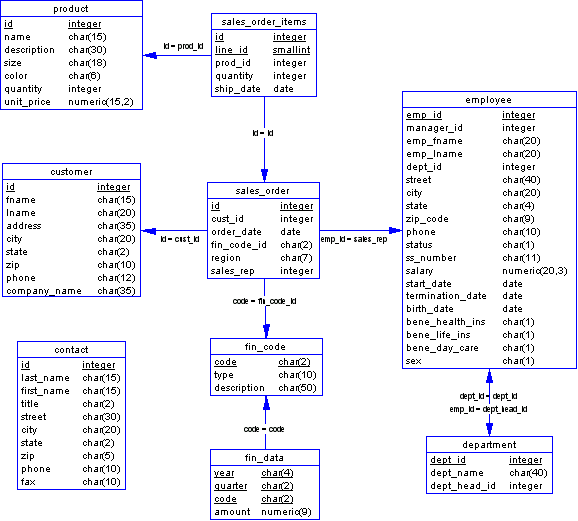
 Change 1: Add a column
You are now ready to make the first of the three changes, namely adding the unit_price column to the sales_order_items table. You can accomplish this task by accessing the list of columns through the table properties dialogue.
 Add a column:
Display the column properties.
Right-click on the sales_order_items table and select Properties from the context menu.
This dialogue gives you access to the information specific to a particular table. Specific types of information are accessed through the buttons located in the lower half.
Tip |
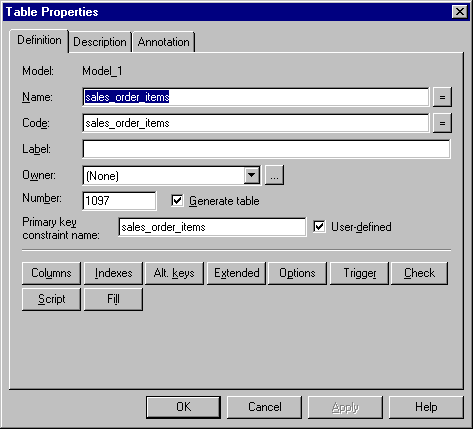
Display the list of columns using the Columns button.
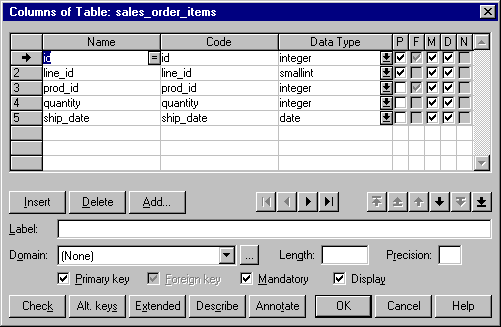
Add a new column to hold the unit price.
Click the Add button.
Enter unit_price in the Name column.
Enter unit_price as the Code column.
Check both the Mandatory and Display options.
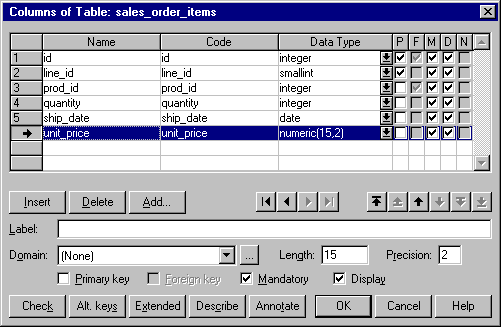
Examine the effect of your changes on the diagram of the database.
Choose OK to close each of the windows.
The sales_order_items table now appears as follows:
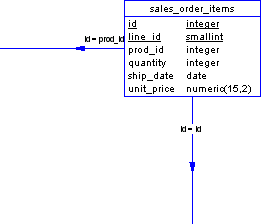
You have now completed the first of the three changes.
 Change 2: Add a table
The second task is to add a new office table. You can easily do so using the table tool. You then add a reference to connect it to the employee table.
 Add a new table:
Select the table tool. Use it to create a new table near the employee table.

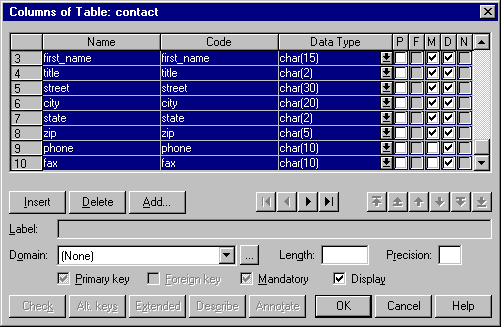
An office has many of the same attributes as a customer or contact. To define the columns of the new table efficiently, first copy the columns of the contact table onto the clipboard using the following steps:
Select the pointer tool.
Tip |
Double-click on the contact table to display its properties.
Display the list of columns using the Columns button.
Select all the columns by dragging on the column numbers.
Copy your selection to the clipboard.
Cancel each dialogue.
Define the properties of the new table.
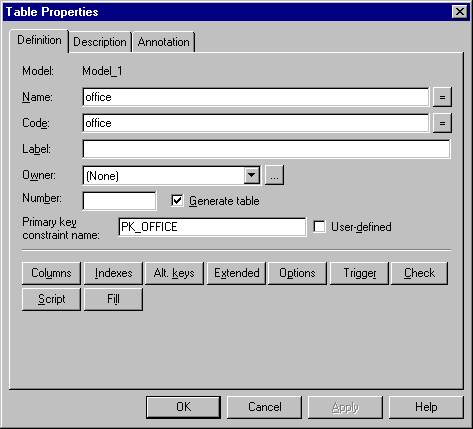
Double-click on the new table to display its properties.
Enter the word office in both the Name and Code columns.
Define the columns of the new office table.
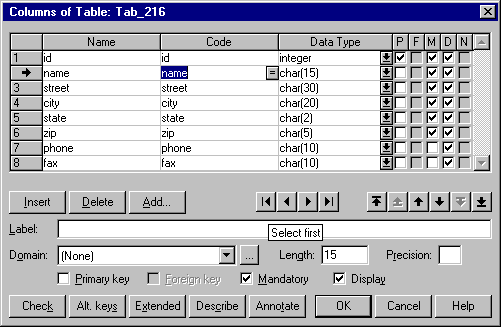
Display the list of columns using the Columns button.
Paste the columns of the contact table from the clipboard.
Delete the first_name and title columns.
Change the name and code of the last_name column to just name.
Tip |
Select the id column and verify that it is a primary key.
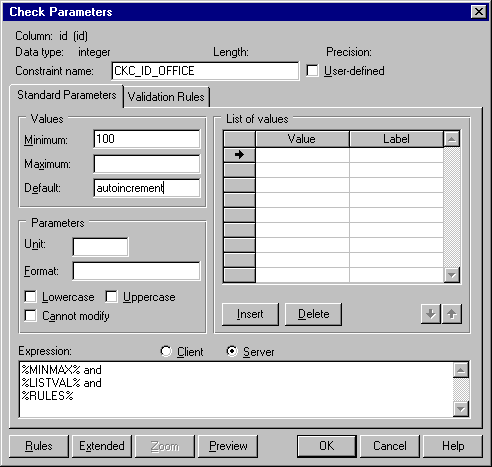
Define a check condition for the id column of the new office table.
Select the id column by clicking on its column number.
Display the Check Parameters dialogue.
In the Standard Parameters tab, enter the minimum value 100 and the default value autoincrement.
Choose OK to exit each dialogue.
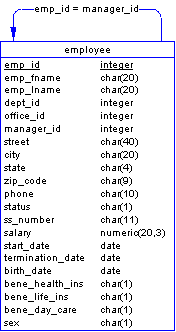
Complete your changes to the office table. Choose OK to exit each dialogue. Your new table should appear similar to that shown below.

 Add a reference using the reference tool:
Select the reference tool. Use it to create a new table near the employee table.

Drag from the employee table to the office table.
Notice that a new column named id appears in the employee table.
The column name office_id is probably more appropriate for the employee table. Change the name of the new column to office_id using the column properties. (Remember to de-select the Reference tool, first.)

You have now completed the second of the three changes.
 Change 3: Add a reference using the Dictionary
While completing the second task, you added a reference using the reference tool. In this portion of the tutorial, you learn another way to add and manipulate references. In so doing, you will discover a very important feature of SQL Modeler, the dictionary.
The Dictionary is a master list of all the objects in your schema. It is very useful both because it lets you see all the objects of each type side-by-side and because you can choose not to display some objects in the diagram. Your only means of accessing such objects is through the Dictionary.
 Add a reference using the Dictionary:
Choose Dictionary->List of References.
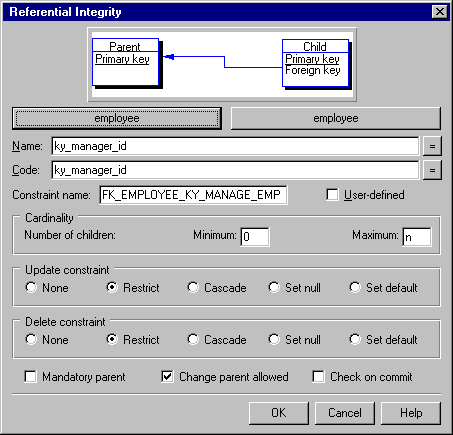
Add a new reference. Use ky_manager_id as the name and code. Since this will be a reflexive reference, identify the employee table as both the parent and the child.
Set the referential integrity properties of the new reference.
Display the Referential Integrity dialogue.
Set the cardinality to be 0 to n, an employee may manage any number of other employees, or may manage none.
Set the update and delete constraints to restrict.
Choose OK to close each dialogue.
When you add the reference, SQL Modeler adds a new column named emp_emp_id to the employee table. The name manager_id was previously in use and is much better.
Display the properties.
Delete the manager_id column.
Rename the new column manager_id. Update the code, too.
Choose OK to close each dialogue.
Notice that SQL Modeler updates the condition on the new reference automatically.

You have now completed the third of the three changes.
 Check your work
A big advantage of SQL Modeler is that you can quickly detect many errors simply by examining your new diagram.
 Check your new schema:
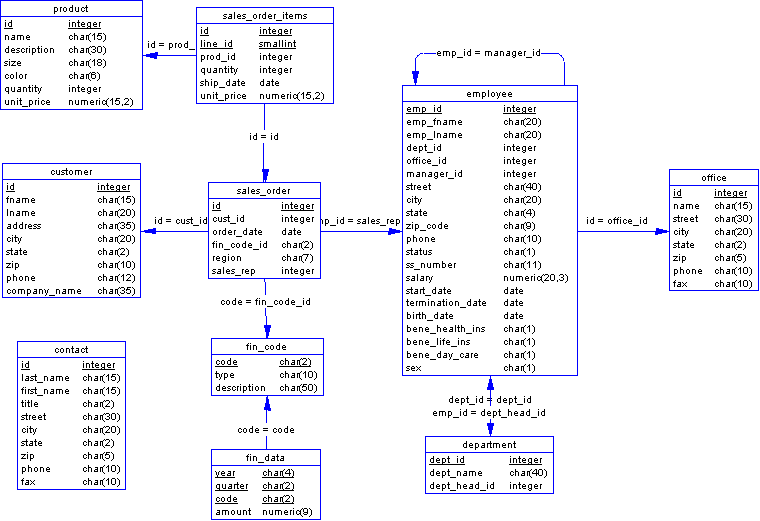
Check your new model using the diagram. Your new database should appear similar to the diagram shown below.
Ask SQL Modeler to check your model.
Choose Dictionary->Check Model. The default options should suffice.
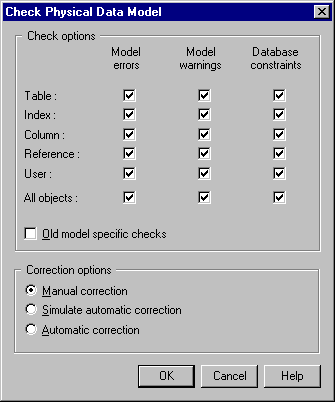
Choose OK. Your model should contain no errors.
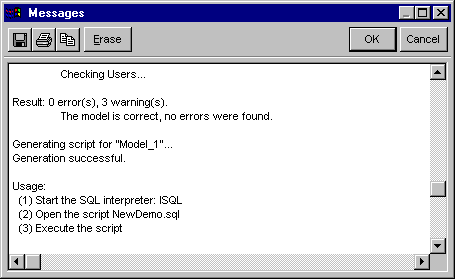
 Save your changes and generate the new database
Models that depict the physical components of your database design, including tables and columns, are called physical data model (PDM). SQL Modeler stores these in files with the suffix .PDM.
 Save the physical definition file (PDF):
Choose File->Save As. Save your physical data model in a convenient location.
An easy way to create a database using your new design is through means of a SQL script that implements all the components of your model.
 Generate a SQL script to create your new database:
Generate a SQL script.
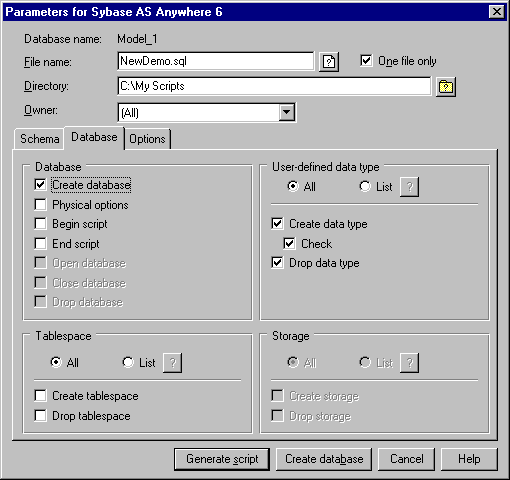
Choose Database->Generate Database.
Use the script name NewDemo.sql. Choose a convenient directory.
Under the Database tab, choose Create database.
Observe that options give you control over many other properties of the generated script.
View the new script.
Choose Yes to view the generated script.
Check that your changes are reflected in the script. For example, the definition of the new office table is shown below.
/* ========================================= */
/*   Table: office                           */
/* ========================================= */
create table office
(
   id            integer         not null
      default autoincrement
      check (
         id >= 100),
   name          char(15)        not null,
   street        char(30)        not null,
   city          char(20)        not null,
   state         char(2)         not null,
   zip           char(5)         not null,
   phone         char(10)                ,
   fax           char(10)                ,
   primary key (id)
);
You can create your new database from Interactive SQL.
 Create the new database:
Start Interactive SQL.
Connect to the sample database. You can use the same ODBC connection.
Create an empty database.
Use the following command, substituting any convenient directory.
CREATE DATABASE 'c:\\My Databases\\newdemo.db'
Close the connection to the sample database.
Connect to the new database.
Enter dba as the User ID
Enter sql as the Password
Enter the full path and file name of the new database file.
Execute the script.
Use the read statement. Remember that this command demands that you enclose the file name in double quotes.
READ "c:\\My Scripts\\newdemo.sql"
You use these basic steps to modify other databases.
